Blouse pattern zapone and neckline V. That is, a pattern of a blouse with a low shoulder. But what do we mean when we say zapone? It is the blouse or dress that does not have sleeves glued to the shoulder, but the sleeves come by extending the shoulder line along the length we want to have on our sleeve.

We will start by designing it basic blouse pattern , the front part in our size, but without the darts. We will change the position of the waist dart and we will not use the chest dart.
In the same pattern we will design the neckline of the back pattern. We do not need to design the back separately because there is basically no different armpit.
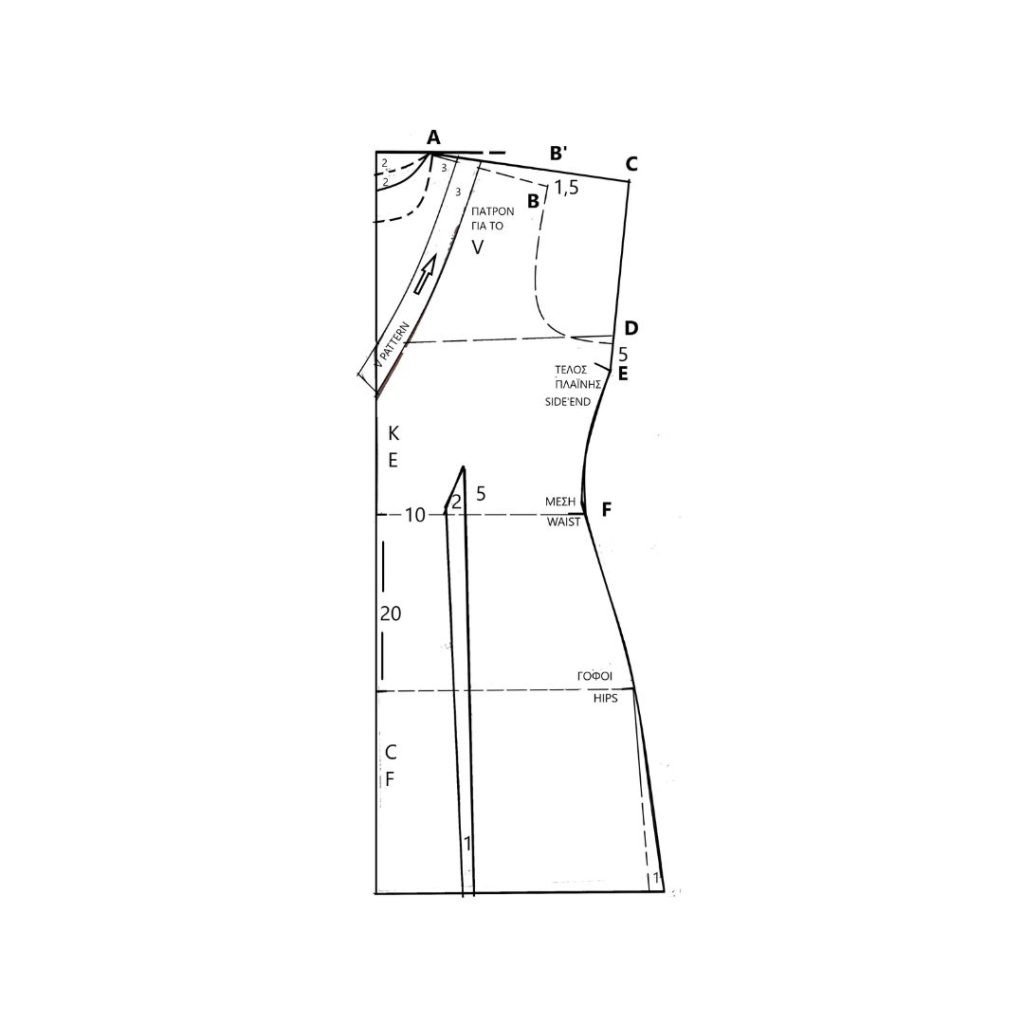
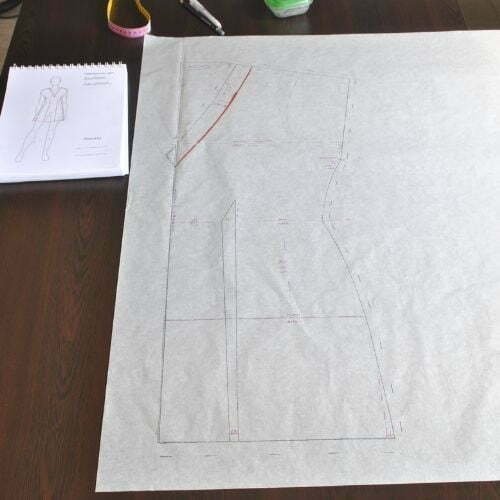
From the tip of the shoulder (point Β ), we go up 1.5 cm. to the point B ‘ . Redesign the shoulder line, extending it 9 cm, up to the point C .
We join the shoulder with the waist passing through the point D .
DE 5 cm That will be the end of the sleeve. That is, the opening for the hand will be the CE .
We will put waist darts to gather the blouse a little to fit it on the body.
From the center front (CF) we measure 10 cm on the waist line and at this point we measure 2 cm. (where our darts will be), facing the CF.
At the same point on the hem we measure 1 cm. with direction to the center front (CF). We join our points as shown in the drawing (Front pattern).
Because the darts remove 1 cm from the hem, we add it to the side.
The length of the blouse can be any. You can do it up to the waist ( 45 cm), to combine it with a pair of high-waisted pants or you can do it up to the hips (65 cm). I made it 85 cm. counting from the CF.
From the neckline (point A ), we measure 3 cm. at the shoulder line and form the V-neckline, reaching up to the chest line. Fold our paper over the line of the CF to copy the V finish for the facing. The facing will be 3 cm. as shown in the drawing.
Open a little and the back neckline 2 cm.
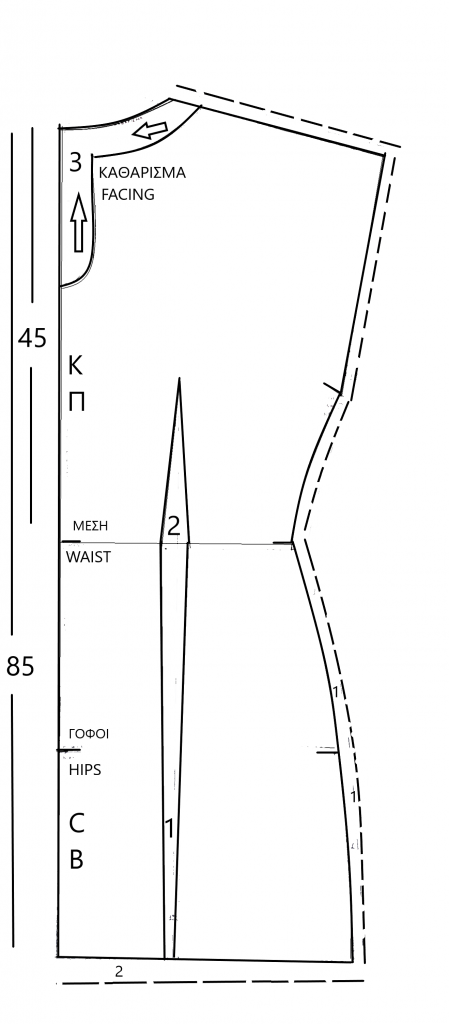
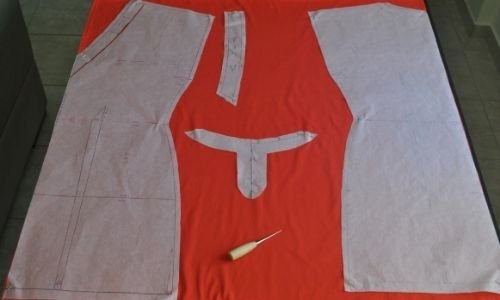
We copy the back pattern on a new paper. The back pattern is exactly the same as the front with the same contours on the sleeve, in the middle, on the hips, but with the back neckline.
We put the darts in the center of the waist line 2 cm. as in the front, ending 1 cm. on the hem.
We also plan the facing of the back neckline as in the drawing (back pattern).

We are ready to put seam allowance. 1 cm perimeter of the pattern except the CF and the CB. If you want to have a seam in the CB, then put a seam allowance there as well. I have chosen not to. We put 2 cm. seam allowance on the hem.
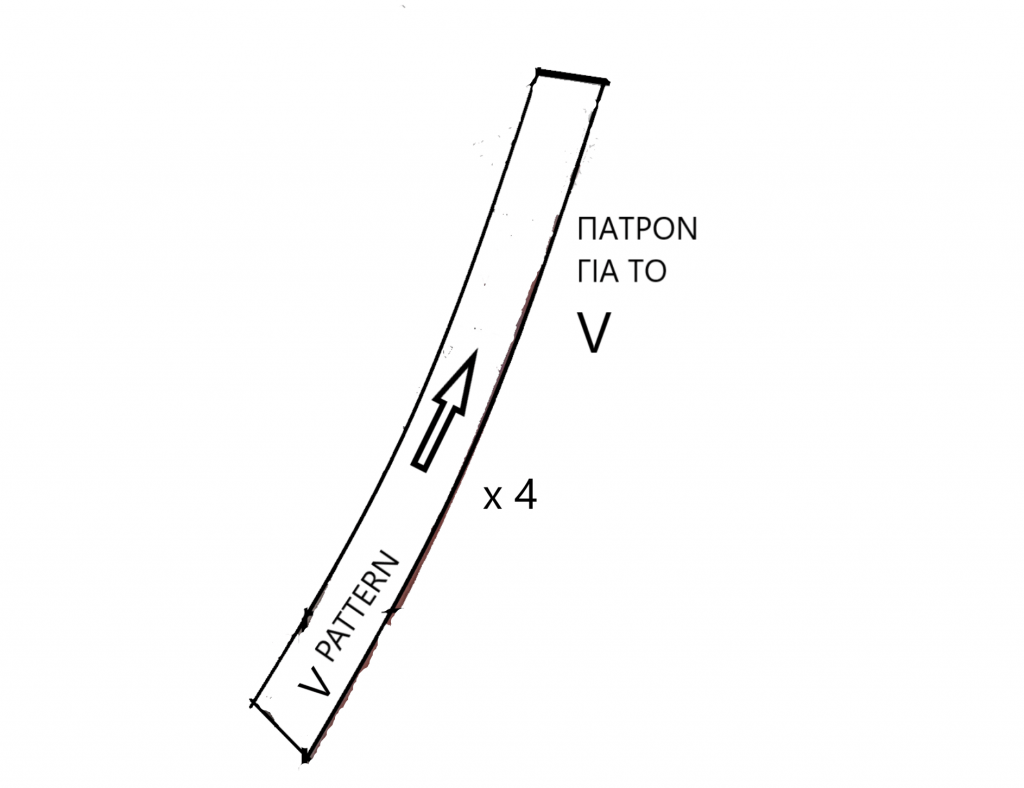
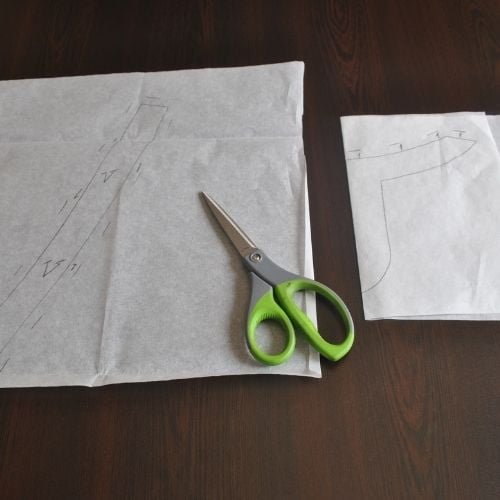
We copy the facings on a new paper and put a seam allowance in them as well. Cut the patterns and place on the fabric.
See photos from my own work for “ blouse pattern (zapone) and neckline V ».


Want to learn how to sew the V-neck facing?
Definitely a great challenge for beginners! !
στο marketplace εχετε τα πιο ωραια χειροποιητα προιοντα! ειστε μοναδικοι!!!!!!!!!!!!!

αγορασα μολις το macrameline μακραμε φορεμα! δεν αντεχω να το περιμενω !!!!!!!!!!!!!!!!!!!!!!!!!!!!!
πολκύ βοηθητικά τα βίντεο που ανεβάζετε
Είστε το site με τα περισσότερα πατρόν – ΤΕΛΟΣ!!!
Response from Sxedio Modas
Σας ευχαριστούμε πολύ!!!
i found you out of luck ,thanks god! a greek site that concludes everything i want! i cant read or speak greek yet but i work in greece and it s dificult for me to explain whatever i need each time to the sellers! i really needed you!!!!!

Ακόμη και να μη σπούδαζα σχέδιο μόδας θα καταλάβαινα τα πάντα! Πολύ καλή δουλειά, συνεχίστε να ανεβάζετε πατρόν!
tin ekana oli plekti!!!!!!!
dn exw empeiria,to eftiaxa alla de m petyxe k polu…isws to xanakanw..kamia symvouli??
Response from Sxedio Modas
Αν είστε αρχάρια ακόμη, καλύτερα να προτιμήσετε κάποιο ευκολότερο πατρόν όπως απλή φούστα ή t-shirt. Υπάρχουν όλα, κι ακόμη πολλά, στην ιστοσελίδα μας! Καλή επιτυχία!
ειναι ευκολο να το τροποποιησω για να ειναι εξω ο ωμος??
Response from Sxedio Modas
Όχι, για να βγει πετυχημένο αν δεν είστε γνώστης, καλύτερα να επιλέξετε κάποιο άλλο πατρόν που να είναι με έξω τους ώμους. Σας ευχαριστούμε για το σχόλιο σας!
this pattern is really flattering for us who have some extra weight!!!


And get a pattern and instructions on how to sew this famous "Japanese Knot Bag"